
Tool Guides
This page provides links, user guides, and other resources for the SciServer suite of web apps.
User Guides
The guides below will get you started with the basics of our web apps, and web app also has a help section which you can refer to while using it.
How-To Guide
There is a SciServer “How To” page available here which aims to answer some of the common questions Users have about how to make best use of the SciServer system.
Login Portal
Summary
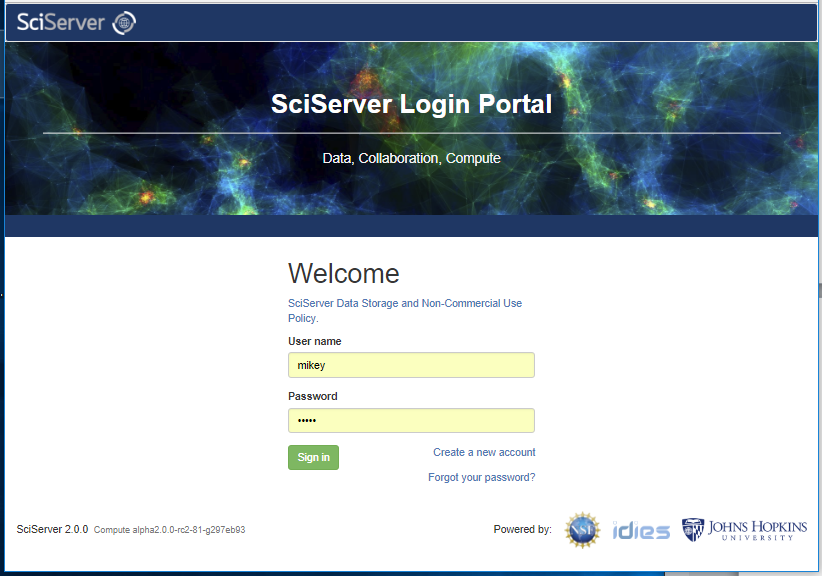
The SciServer Login Portal is the single, common, place to sign-in to all SciServer applications. After signing in, the User will be signed into all applications until they sign out. SciServer currently manages its own user accounts, and continues to support legacy CASJobs accounts which can be migrated to the newer SciServer identities.
To get started, navigate to Login Portal
The Login Portal manages a few activities:
- Logging in
- Registering a New Account
- Migrating a CASJobs account
- Changing a password
Logging In
To Log in, simply enter your username and password and click the “Sign In” button. This will take you to the SciServer Dashboard.
Registering a New Account
To register a new account, click the link “Create New Account” under the password box.

At the Registration page, enter the following:
- User name
- Password (twice)
- Select the “terms of service” checkbox
Then click “Create Account” which will send you an email and take you to a Validation page, where you enter your verification code:

Finally, click “Complete account creation”, then you can go back to the Login Page to access your new account.
Migrating a CASJobs Account
When creating a new account, there is information at the top of the page explaining what to do:

The requirements are:
- Enter your existing CASJobs username
- Enter your existing CASJobs password
- Press “Create Account”
If you do not enter the correct details, you will not be able to access your existing MyDB if you had one with data in, but rather you will create a new Identity with a new MyDB. If you have trouble with this step, contact SciServer user support here.
Changing a Password
At the Login Page, click on the link that says “Forgot your password?”, which will take you to a password reset page:
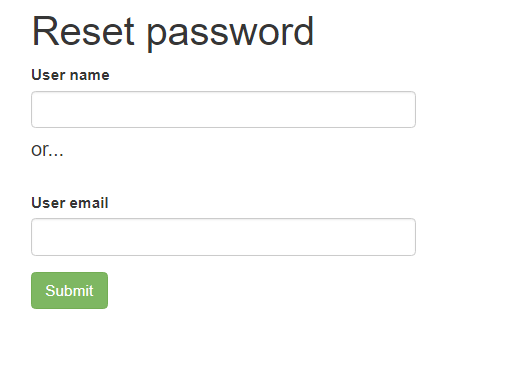
Enter either your Username or your Email, and press the Submit button, and this will take you to a page to reset your password, which you type in twice:
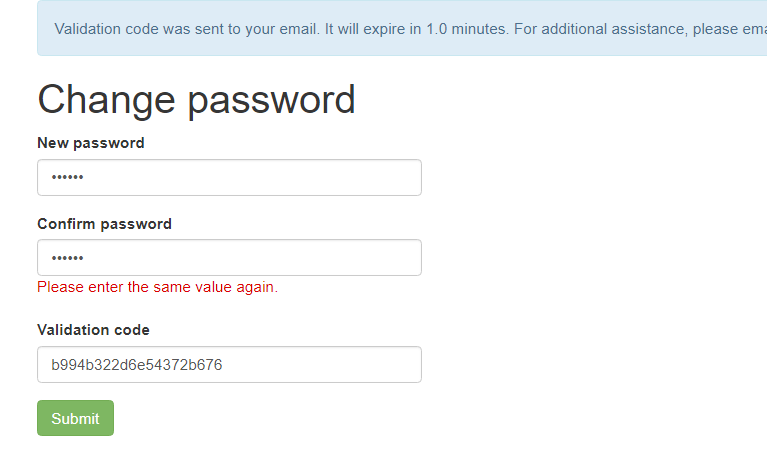
You will also be sent a verification code to your registered email address. Enter this code in the “Change Password” form, press the “Submit” button and your password will be reset.
If you encounter problems or unexpected behaviors, or if you have suggestions, please let us know through our feedback form.
Dashboard
The SciServer Dashboard is the application that allows users to manage the work they are doing with SciServer and the other applications available. A user will be sent to the Dashboard Home Page after logging in from the Login Portal, and can navigate back to the Dashboard from most other SciServer Applications via shortcuts. More detailed help for the Dashboard can be found here: SciServer HowTo
Home Page
The Homepage for the Dashboard looks like this:

Menu and Functions
The Dashboard has a main “Menu Bar” across the top which is always visible in all views of the Dashboard, providing access to the following core features:
– Home: Brings the user back to the Home Page
– Files: Navigates the User to a Tab to manage Files and Folders
– Groups: Navigates the User to a Tab to manage user defined Groups and sharing
– Apps: Displays a drop-down menu allowing the User to launch any of the supporting SciServer Applications (Home, Compute, Compute Jobs, CasJobs, SciDrive, SkyServer, SkyQuery)
– Activities: Navigates the User to a tab displaying a tabular summary of the history of their activity with SciServer functions and applications
– Profile: A Menu dropdown that displays additional options for the user (access Profile, Access Help, Change Password, Sign Out)
Function Shortcuts
A set of shortcuts are displayed to access the many functions in the Dashboard application itself:

In particular the User can access:
– Files
– Groups
– Compute Jobs
– Activity Logs
Each of these shortcuts also displays information about recent activity on, or notifications about, each function.
Application Shortcuts
A second row of shortcuts allows the User to launch
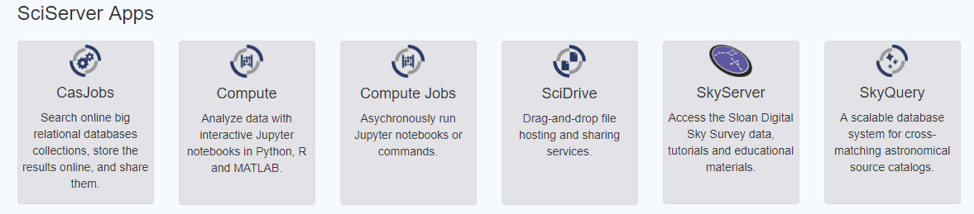
Each of these shortcuts will launch a separate web app in a separate Browser tab. Note that “Compute Jobs” is in both shortcut lists.
Files Page
Summary
SciServer provides a number of features for managing files and compute notebooks, all of which will be made available in both the Sciserver dashboard application and in SciServer Compute containers from within Jupyter Notebooks. All the common capabilities of File management are provided, such as renaming, moving, copying etc, but also sharing of “User Volumes” for collaborative work. NOTE: the File Management features provided in the SciServer UI are different to the services provided by SciDrive, which is an older storage system that is still supported for legacy applications.
Permanent or Temporary Storage?
Users can create a number of top level “User Volumes” under which new folders and files may be added. User Volumes can be created in one of two different storage pools: a permanent pool called “Storage” and a short-lived pool called “Temporary”. Folders and files in User Volumes under “Storage” will be backed up and permanent, but there is a quota limit of 10GB. Folders and files in User Volumes under “Temporary” are not backed up, and will be deleted after a particular time period, but there is no imposed limit or quota on how much data can be stored (because it will be deleted).
Most users should store their data and files in a “Storage” User Volume. The “Temporary” User Volumes are meant to be used as intermediate storage for SciServer Compute calculations.
SciServer Dashboard View
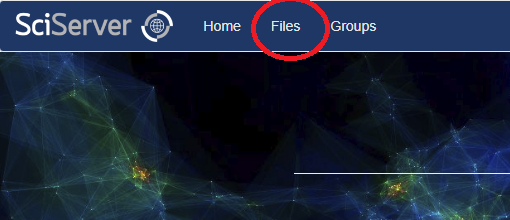
– Login to the SciServer dashboard and select the “Files” tab:
– This will show the Files View at the top level of “User Volumes”:

There are a number of User Volume operations available in this view:
– Hover over each row to view available operations
– Click on the ellipsis button to view available operations
– Share: If the user has the appropriate permissions, they can share a User Volume with other users, or groups of users.A User Volume created by the user is always shareable by them,
– Delete: If the user has the appropriate permissions, they can delete a User Volume. A user can always delete a User Volume they create.
– Edit: The User Volume name can be changed, and a description provided for it.
– Different icons refer to different levels of sharing:
– ![]() This User Volume is owned by the user, and has not been shared
This User Volume is owned by the user, and has not been shared
– ![]() This User Volume is owned by the user, but has been shared with another user or group.
This User Volume is owned by the user, but has been shared with another user or group.
– ![]() This User Volume is not owned by the user, but has been shared with the user by another user or group.
This User Volume is not owned by the user, but has been shared with the user by another user or group.
Selecting a Folder in the LHS column will open that folder up, one level at a time. It does not provide a tree view.
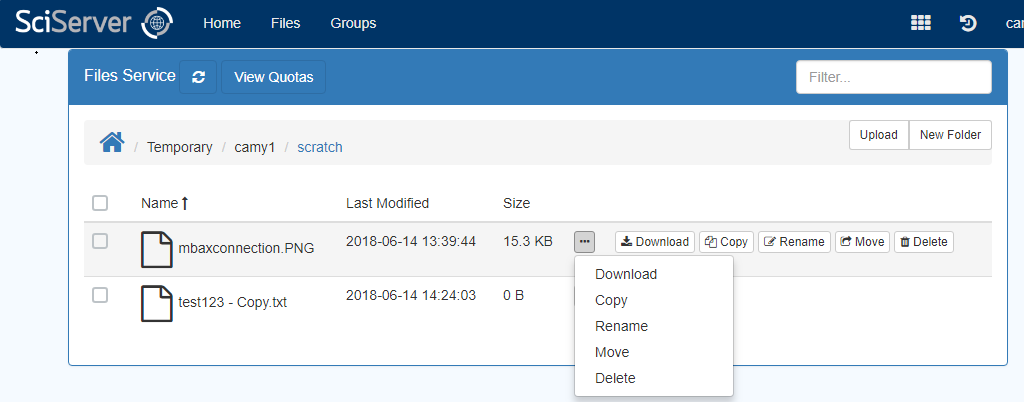
There are a number of file and folder operations available in this view
– Hover on each to view available operations
– Click on the ellipsis button to view available operations
– Copy
– Rename
– Move
– Delete
– Download: A file can be downloaded (but a Folder cannot)
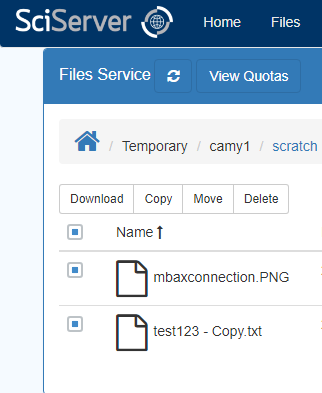
Perform multiple operations on files or folders
– Check one or multiple checkbox
– Menu gets displayed with available operations on top
– Click on any menu item to perform an operation
Groups View
SciServer provides a feature called ‘Groups’ for users to share their resources with their collaborators privately. The resources that users can share are file folders, databases, volume containers, and Docker images. Also SciServer provides a Group view which lists all the shared resources among group members.
SciServer Groups allow you to create lists of Users and to share resources, such as file Folders, to all of them at once. You can manage a team of people in a project by creating a group with the relevant users in, and allowing everyone to work from the same shared folder. Importantly, you can also make sure that no one who is not in the group can access the shared folder, so you can keep things private.
Create a new Group
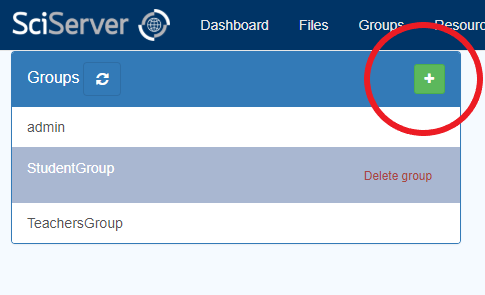
Select the Groups tab in SciServer:
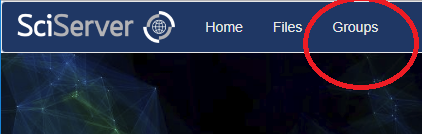
This will show the Groups View:
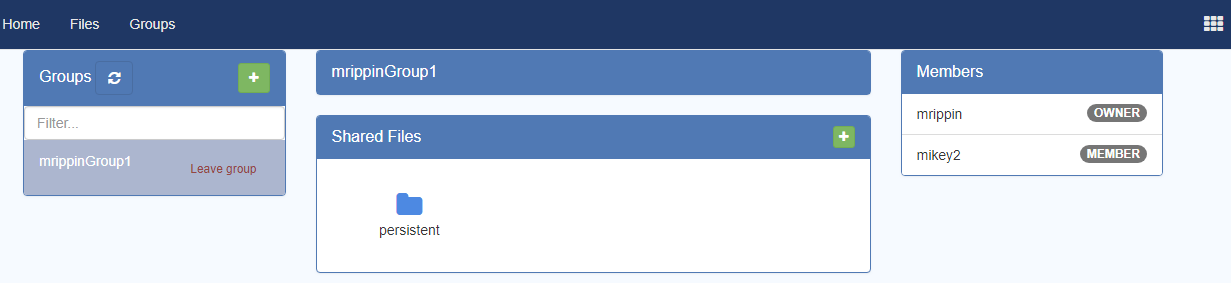
– The left hand box will show you all the groups that you are a member of. As you select each one, the middle set of boxes will show you which resources have been shared with that group, and the right hand box will show you all the members in the group.
– To Create a New Group, click the “+” button on the LHS “Groups” box:
– This will open the “New Group” dialog box:
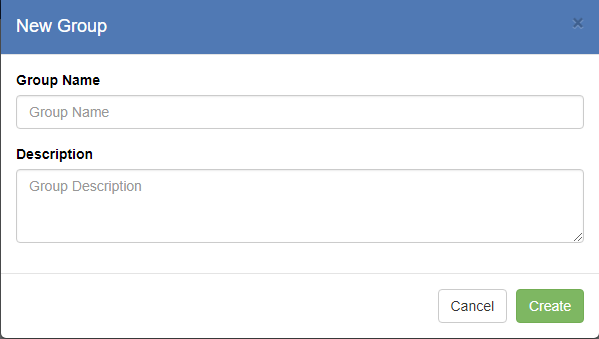
– Enter a name for the Group and an optional Description, then press the “Create” button. This will show your new Group in the “Groups” box, and will show you as the only member in the RHS box:

If you encounter problems or unexpected behaviors, or if you have suggestions, please let us know through our feedback form.
CASJobs
Logging In
The first thing you may notice about CasJobs is that the login system has changed. The “create account” and “login” links have gone from the navigation menu, and have been replaced by the new SciServer login control in the top right corner of the window.
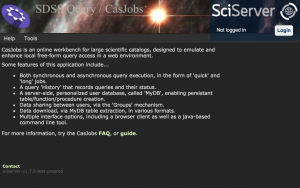
Click “Login” in the SciServer control to login to CasJobs via the SciServer Login Portal. Once logged in, you will automatically be redirected to the CasJobs Query page.
File Output
SciDrive is a new SciServer tool you can use to save your MyDB tables. In addition to downloading the contents of your MyDB tables in CSV, FITS, and VOTable formats, you can also save them to SciDrive.
The screenshot below shows how to select SciDrive from the Table Download menu. The textbox after SciDrive is the name of the container in SciDrive into which the table will be saved; the default value is first_container.
When you click Go, you will be taken to the Output page, where your request will be listed under “Pending Output”. Once the write to SciDrive finishes, the name of the table will appear under “Available Output”. The next time you log in to SciDrive, you will see the contents of that table in the container whose name you specified (defaulting into first_container). See the SciDrive instructions below to learn how to work with the data file you just wrote.
MyScratch
MyScratch provides support for very large queries.
The Sloan Digital Sky Survey contains so much data about the night sky that it is all too easy to write a scientifically useful query that fills up all the space in your MyDB. Although you can request additional space, it takes time for us to grant you the space, and it interrupts your work. This delay is particularly frustrating when you are selecting intermediate data that you know you will subset or summarize later, and so you know that the huge result set will only be temporary.
The new SciServer-based CasJobs system solves this problem by offering MyScratch shared temporary storage space. MyScratch is like a single very large database shared among all CasJobs users. Because MyScratch is shared among all users, older data are deleted when more space is needed for new user queries, but we guarantee that your data in MyScratch will be available for at least one week.
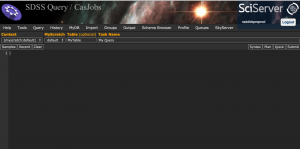
To select data into MyScratch, modify your query by adding an into clause. For example, to select into a table called MyTable in the MyScratch space, add into [myscratch:default].MyTable. Formatting is very important – the default myscratch call must be all lowercase, enclosed in brackets. The screenshot below shows an example of a query that selects SDSS DR12 photometric data into MyScratch.
![A query that selects data into default MyScratch by adding "into [myscratch:default]"](/wp-content/uploads/2015/12/myscratch_query-300x122.png)
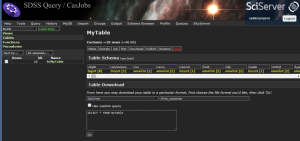
Once you have selected data into a table in the MyScratch space, you can work with that table on your MyDB page just as you could any table in your own MyDB. The key is to select the [myscratch:default] context from the dropdown list at the top left of your MyDB page, just under the CasJobs logo. Once you choose the [myscratch:default] context, you can click on the Tables link to explore tables in MyScratch, just as you would in your own MyDB.
Once your query has completed, the output table you just created should appear in the tables listed for the [myscratch:default] context. Select the table you just created by clicking on its name in the tables listed in the MyScratch context. You will see the table contents displayed on the right hand side just like with MyDB tables. Note that there are fewer buttons for MyScratch table – you can add notes to the table, view a sample of the data or download it.
You can also query tables in MyScratch from the Query page, just as you can tables in your own MyDB. To query a table in MyScratch, you must do two things: select [myscratch:default] as the context from the Context menu above the query window, AND also add [myscratch:default] in front of the table name in your query, like this: from [myscratch.default].TableName.
If you want to download the MyScratch table, the procedure is the same as if you wanted to download a table from your own MyDB. Click on the Download button and select an output format. SciDrive is available as an option for tables in MyScratch as well.
If your table is large, the download operation could take several minutes or even hours. It might be more efficient to view and save subsets of your MyScratch table through the Query page.
Note that you have to be in the [myscratch:default] context to do anything with the MyScratch table, and even if you are in that context, you must always explicitly prefix the table name with the [myscratch:default]. qualifier.
More help
More help is available on CasJobs’s Help Page, which contains the following sections:
If you encounter problems or unexpected behaviors, or if you have suggestions, please let us know through our feedback form.
Interactive Compute
This section describes how to connect to SciServer Compute, create a container, and start up your first notebook.
- Login to SciServer:
Navigate your browser to login-portal.
If you don’t remember your SciServer username or password, you can create a new one. - Start up SciServer Compute:
Navigate your browser to compute. - Create a Container:
You will need to create a container, if you don’t already have one. Click on Create Container.
Give your container a name.
Choose an image. Different images contain different software libraries, and support different execution tools (Jupyter, JupyterLabs, Matlab etc).
Choose User and Data volumes to attach. You will always want to attach /Storage//persistent and /Storage/ /scratch. Persistent holds your working files and scripts. Scratch is temporary space for large result sets. Any data you save in Scratch is guaranteed to be available for a week, minimum. - Open your Container:
Click on its name. It displays in Jupyter the volumes you attached, so click on Storage//persistent to open it.- Create or import your notebook:
You can now get started with your Notebook. Please have a look at our example notebook walkthrough to see what you need to do to connect to CasJobs, your MyDB, and SciDrive. - Open your Container:
SciServer hosted a Compute Workshop in April 2016. Example notebooks from the workshop are available on the workshop documentation pages.
If you encounter bugs or have questions or suggestions, please let us know using our feedback form!
Compute Jobs
Summary
Compute Jobs allows a user to run a Jupyter Notebook or a standard script in offline batch mode. The same exact capabilities are provided as for Interactive Compute:
– Compute Images and software environment
– Mounting external volume folders
Executing a Job will put it in a queue, and it will be run when there are resources available on the server cluster.
Jobs vs Interactive
You should create a Job for the following reasons:
– Executing your notebook may take a long time and you want to set it running and do something else without worrying about browser sessions timing out etc
– You may develop your code interactively to make sure the algorithm works, using a small amount of data to test it out. But you really want to run your code against a full dataset which will require massive resources for memory and CPU, as well as execution time.
– You are provided with far more resources (CPU and memory) to execute a Job than you are in an Interactive Session.
Creating a Job
SciServer allows you to define two “types” of job:
– Specify a script to execute, or a command line command
– Specify an existing Jupyter Notebook that you have previously developed
The second of these is the most useful in that you can develop your Jupyter Notebook interactively then “submit” the exact same notebook as a Job.
To create a new Job.
– Go to the Compute Jobs Page:
– Click “Run Existing Notebook”
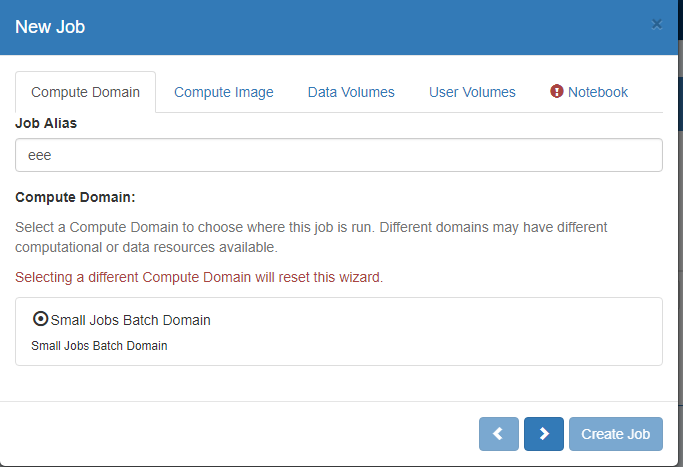
On the ‘Compute Domain’ Tab:
– Choose the Compute Domain, for which there is currently two options (a) Small Jobs and (b) Large Jobs. A Small Job shares resources with up to 4 other jobs and has a max quota for RAM of approx 32GB. A Large Job runs exclusively and has all CPU cores and RAM available (approx 240GB), however since only one large job will run at a time, there may be a longer wait for the job to start. This is described in more detail below.
– Optionally enter a “Job Alias’ to easily identify your Job later
On the ‘Compute Image’ Tab:
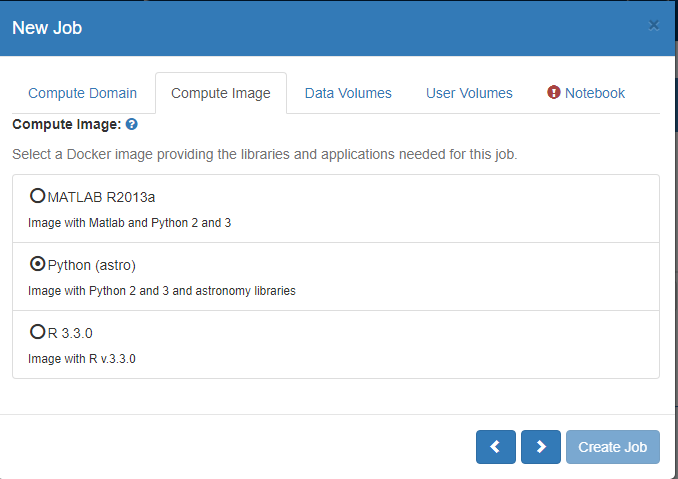
– Pick the ‘Image’ you need to use. Each image contains different tools and programming language support.
– (Compute Images are described in more detail here Images).
On the ‘Data Volumes’ tab:
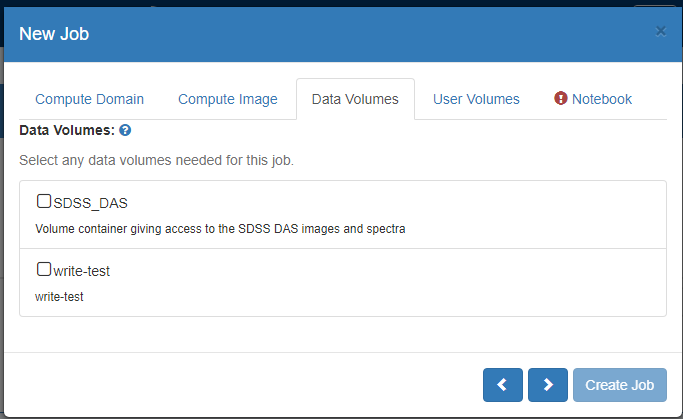
– Select all the data volumes with appropriate permissions needed for this job.
On the ‘User Volumes’ Tab:
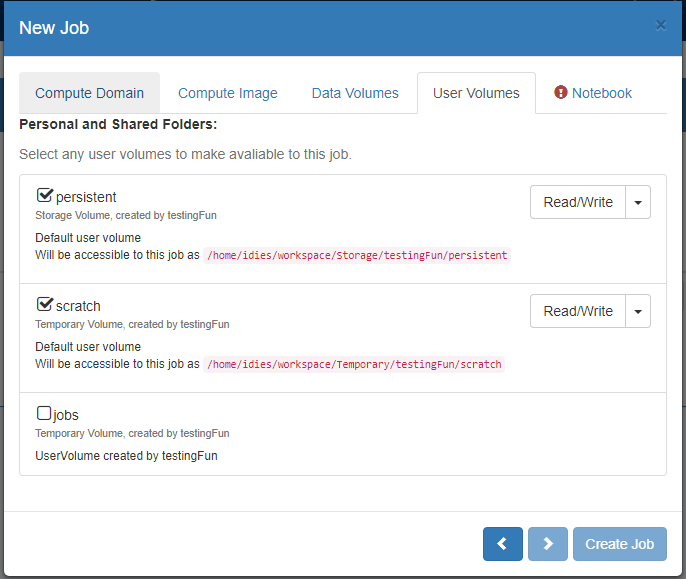
– Select all the Folder systems that you would like to be made accessible to your Compute notebook
– For Folders that you own, or that have been shared with you and you were given the appropriate permissions, you can select whether a given folder is read only or writable. Folders that you do not own will be readonly by default.
On the ‘Notebook’ tab:
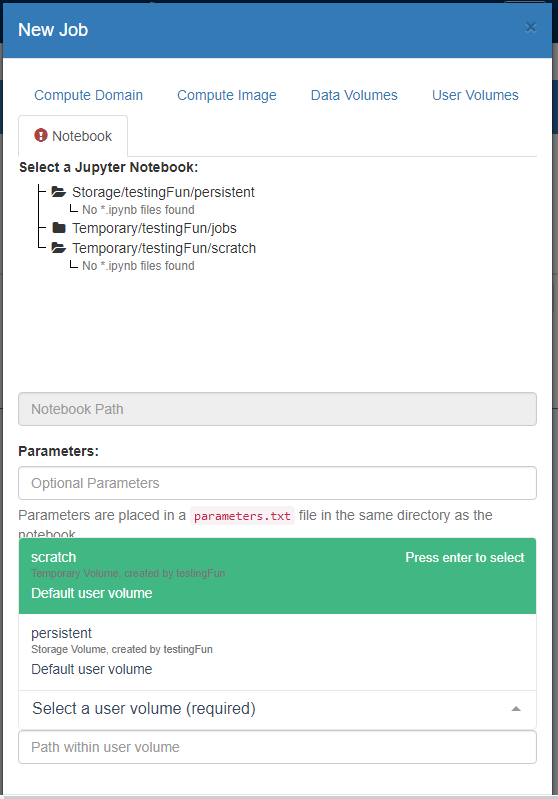
– Navigate to the Notebook you wish to use as the basis for your Job, and select it
– Enter any additional parameters that the Notebook can read in to affect how the code is executed
– Choose a directory where the output results will go.
— By default these will go to jobs within which subdirectories will be created and your results written to.
— Alternatively you can choose a specific directory to output results. The directory you choose will be a ‘root’ within which subdirectories will be created and your results written to.
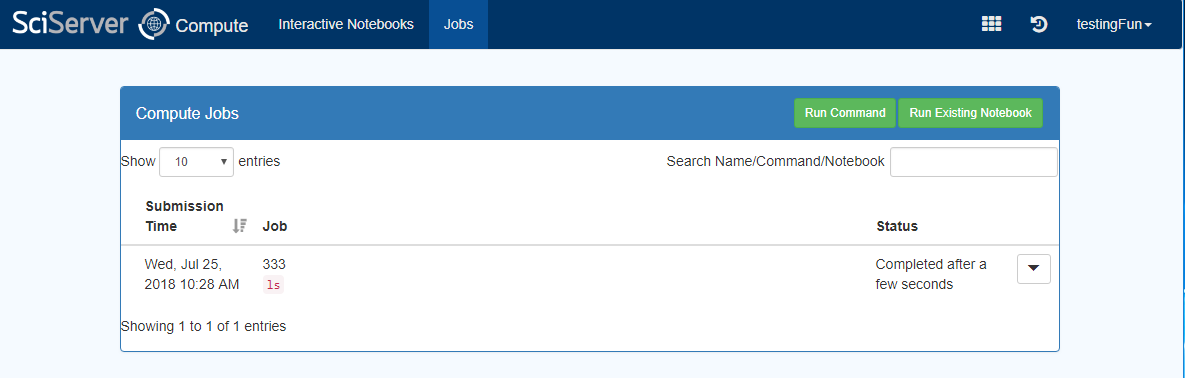
– When everything has been entered you can press ‘Create Job’, and the Job will be submitted, and displayed in a Jobs Table view:
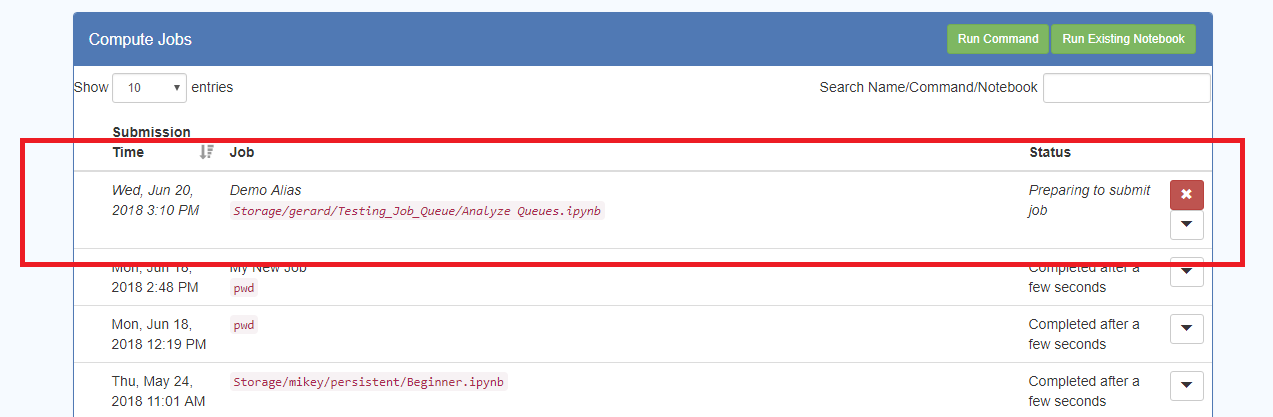
– The Table will be refreshed every several seconds, telling you the status of the Job.
– While the Job is still running there will be a red “X” button, and pressing this will Cancel the job.
– Pressing the down triangle on the RHS will expand the view and show more information about the Job. This is what you see for a completed Job:

– This give status information about the Job, the path to the location of the results, and links to the results output
Compute Domains
SciServer Compute domains define different execution environments with different rules about what resources are available, what Compute Images will be available, and who is allowed to even use a particular Domain. In Compute Jobs it is important to choose the correct Domain to optimize the value from using the SciServer system. The paramaters to consider in picking a Domain are:
- How much RAM is needed
- How much processing power is needed, and in particular do you need single thread or multiple threads
- How long do you expect your Job to run for?
- How urgent is it that the job is started quickly
SciServer Compute Jobs provides two Compute Domains with different Objectives and tradeoffs:
- Small Jobs Domain:
- Shared environment with up to 5 other jobs
- Max Ram: 32GB dedicated
- Processors: up to 32 cores shared with other jobs
- Max Execution Timeout: 1 hour. Jobs that run longer than this will be cancelled.
- Compute Images: All public compute images are made available.
- Large Jobs Domain:
- Dedicated environment with no resource contention
- Max Ram: 240GB dedicated
- Processors: up to 32 cores
- Max Execution Timeout: 8 hour. Jobs that run longer than this will be cancelled.
- Compute Images: All public compute images are made available.
Compute Images
Default Images
A Compute Image is a pre-defined software environment for running a job. There are many images available, and access to them depends on a given users privileges (i.e. some are private to certain groups). There are however a number of standard public images that cover all the basic requirements for executing Python, R, Julia and Matlab code, as well as providing gcc development tools. Simply choose the Image that supports the language you want to run.
A description of the available Images and the installed software libraries can be found here: (Compute Images are described in more detail here Compute Images).
‘Customizing’ Images
For advanced users, it is possible to extend the software environment beyond what is on the default image. For example, if there are domain specific libraries that need to be used. Using the included development tools it is possible, from within a Python or R script, to run git commands, pip install, and other approaches to dynamically install and configure external libraries.
It is currently not possible to save such extensions. However, if there is a clear need for a new domain specific Image to support the community, the SciServer team will be happy to create and make available such a new image.
If you encounter problems or unexpected behaviors, or if you have suggestions, please let us know through our feedback form.
SciDrive
SciDrive is a new tool from SciServer that provides a cloud-based file system integrated with MyDB. SciDrive allows you to convert smoothly from the database-centric view of SkyServer/CasJobs to your own local file system.
Logging In
When you first go to SciDrive, you will see the introductory page with a login button and some instructions (screenshot below). You will see this whether you have logged in to the Portal already or not.
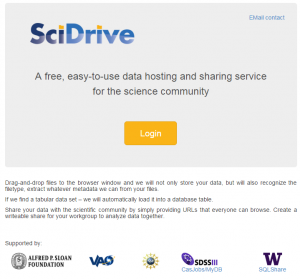
If you are already logged into the Portal and you press the Login button, you will be taken directly to the SciDrive application. If you are not logged into the Portal and you press Login, you will be taken to the Portal first to log in, then automatically redirected to the SciDrive application.
SciDrive has a Help button in the top right with basic instructions on its use. We are adding more information to this help section throughout our testing phase; your feedback as an early adopter will help us figure out how to best support SciDrive users.
Dashboard
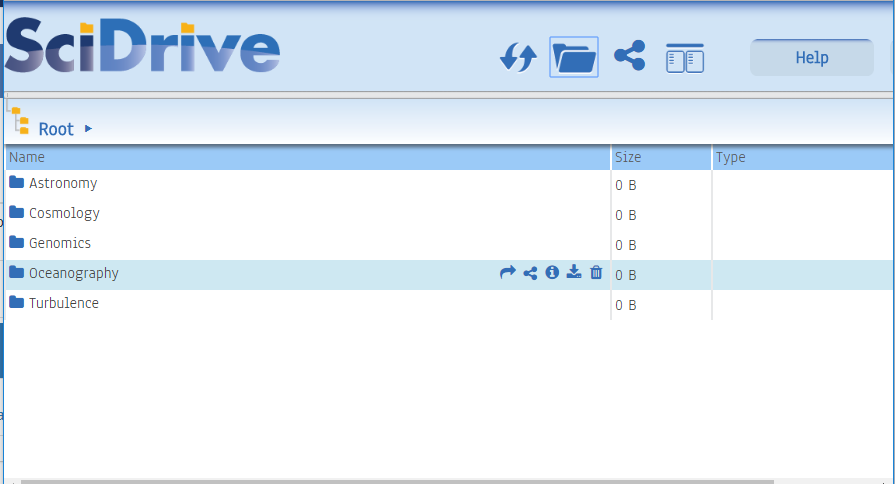
Once you are logged in to SciDrive, you will first see the application dashboard. The action buttons at the top let you perform various actions in the SciDrive interface – mouse over each button for a label. Below is a list of your data containers; if you are new to SciDrive, you will have only the default, called “first_container”. Containers are directories where you can put files. You will also see a small tree-view icon in the top left, that says “Root” next to it. The tree view shows the current hierarchy view. You can only create new containers/folders in “Root”; you cannot add files directly to root.
Click on the container name (e.g. first_container) to see the contents of that container. The screenshot below shows the application home page with first_container selected and two previously-loaded files. If you have not yet loaded any files, it will instead say “No items to display”.
Uploading Files
To upload files into SciDrive, simply drag the files into the SciDrive window. Depending on the file size, it may take a moment to process the file. Once it is processed, the page will show the size and type of the file(s). You can upload any type of file to SciDrive, but the main science support features work best with CSV files.
After you have uploaded files into SciDrive, you can mouseover the file names for additional options. The new action buttons that appear allow you to share the file, to download or delete it, or to see file metadata (under development).
More help is available on SciDrive’s Help Page (you must be logged in to view it).
If you encounter bugs or have questions or suggestions, please let us know using our feedback form!
SkyServer
New features
SkyServer now includes two new features for Sloan Digital Sky Survey Data Access: Accounts and a Query History.
Accounts
 When you first arrive at SkyServer website, you will see the new login control at the top right of the window. If you are not yet logged in, the control will show a login button. If you are logged in, it will show your username.
Whether you are logged in or not, you can continue to use SkyServer as you always have. If you are logged in, new features will be available to you.
Query History
The first new feature is your History page, linked at the far right end of the SkyServer navigation menu.
Click on the History tab on the main menu will open the “My SkyServer History” page, which will show results from SkyServer tools you have used in the past. Until you have created an account and queried SkyServer while logged in, this page will be blank. Otherwise, you may see something like the screenshot below.
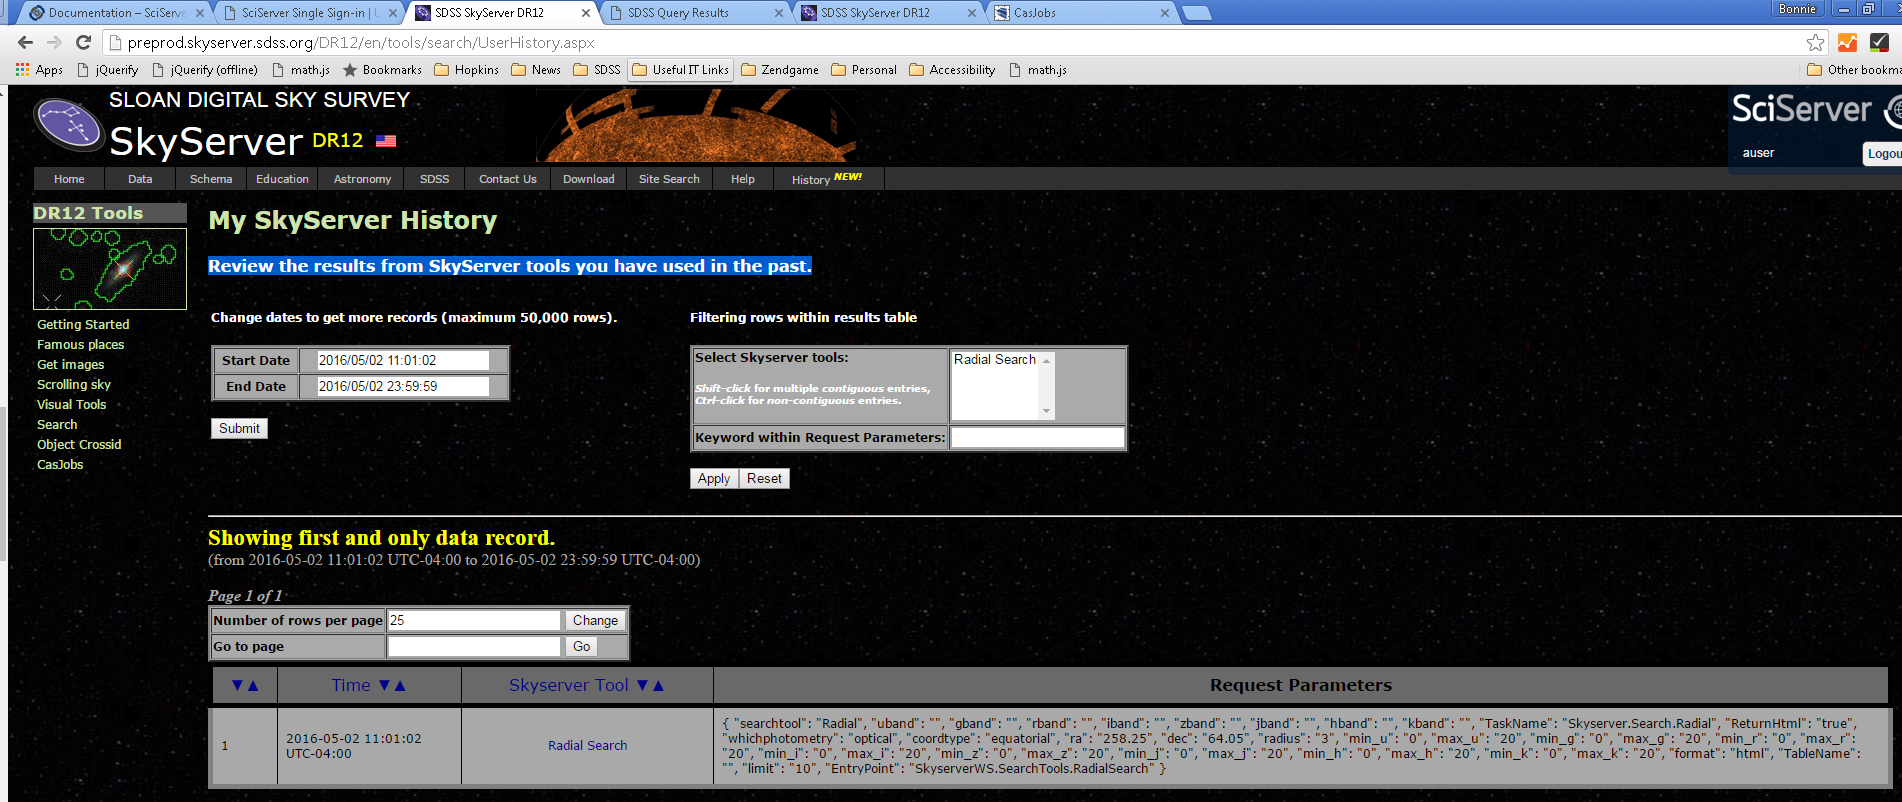
The page will display queries you submitted through the SQL Search tool, and also queries automatically generated by tools such as the Explore tool. The columns in this table are:
- Time: The date and time at which the query was submitted
- SkyServer Tool: The tool from which you submitted the query. This is a link, which you can click on to rerun the query.
- Request Parameters: The options you selected for the query, such as the object IDs or the query string (formatted as a JSON string).
Clicking the tool link will run the query again, showing you either the query results (for queries you submitted through SQL Search) or the original tool view (for queries generated by SkyServer tools).
More help
More help is available on SkyServer’s Help Page.
SDSS resources:
SkyServer resources:
- Welcome to SkyServer!
- SQL Tutorial
- SQL in SkyServer
- Sample SQL queries
- Searching advice
- About the database
- Table descriptions
- Schema browser
- SkyServer API
If you encounter problems or unexpected behaviors, or if you have suggestions, please let us know through our feedback form.
SkyQuery
SkyQuery is a new tool to cross-match astronomical catalogs. You can upload a list of positions and return matching objects in many different catalogs, from radio to ultraviolet.
Please see the SkyQuery Documentation for more information on how to use SkyQuery.
If you encounter problems or unexpected behaviors, or if you have suggestions, please let us know through our feedback form.