
Getting started with SciServer
Create and verify a SciServer account
Go to the SciServer registration page to create the credentials for your SciServer account.
Enter a username of your choosing*, email address, and password.
*Your username cannot be changed once created.
Confirm your password and agree to the SciServer Data Storage and Non-Commercial Use Policies and then click “create account.”
Check the email address you provided for a verification email and follow the link contained therein to complete your registration*. This will automatically log you into SciServer with your username.
*You MUST verify your email before you attempt to login. If you attempt to log-in before verifying you will get locked out of your account.
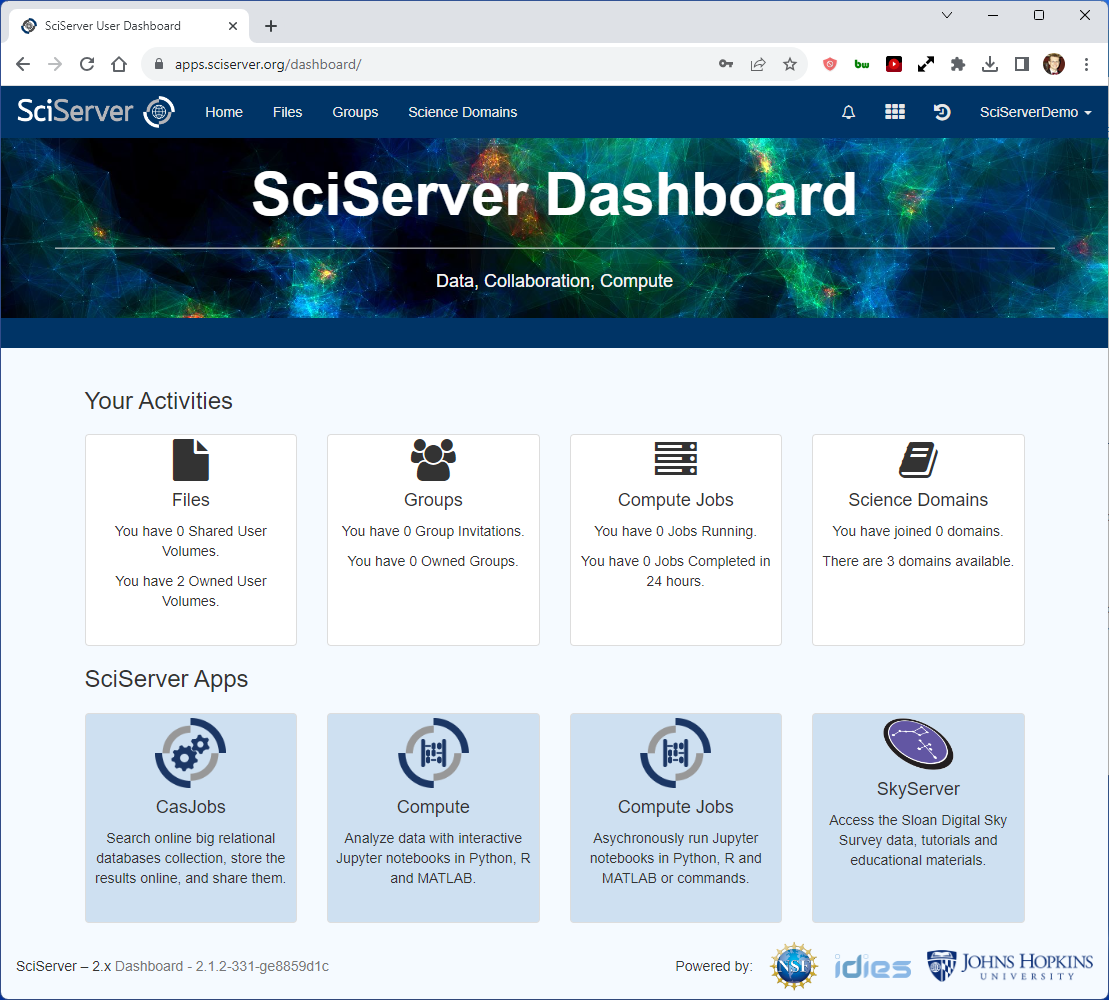
Once logged-in, you should see the SciServer Dashboard. This will be your homepage each time you log into SciServer.
By default, every SciServer user has access to user volumes called persistent and scratch. Persistent is 10 GB of storage owned exclusively by you. You have full read, write, and access granting privileges for your persistent volume, and your persistent volume is backed up. Unlike your persistent user volume, your scratch user volume is NOT backed up.*
You can access your ‘persistent’ user volume, by selecting the ‘Files’ tab.
You should always store all your scripts, and all the final results that you want to save, in your persistent volume.
*For further details on SciServer user volumes, see File Management: User Volume
Join a Science Domain (optional step)
This step is not required in order to do science on SciServer, however, if you are working within a specific discipline and want to quickly and conveniently obtain access to all public resources relevant to your discipline, joining a SciServer Domain will accomplish this.
Science Domains are public and the resources contained therein cannot be modified by users. For the sharing of your own private resources, with the access control, SciServer Groups will be the better fit. To learn more about groups, go here.
To access the domain menu from the SciServer Dashboard, click “Science Domains” located in the top menu bar.
The left panel will contain a list of all SciServer domains. By default, you will not yet be a member of any. Select any of the domains to learn about which resources they offer. Please note, these resources are not accessed from the Domains page itself. Instead, the resources will be available to you as once you create a container.
Select the domain you wish to join from the list in the left panel and click the green “Join” button in the main panel. Once you’ve joined, a check will appear next to the domain name you’ve joined signifying that you will now have access to all resources—including images, datasets, and data volumes—in that domain.
Please note, these resources are not accessed from the Domains page itself. Instead, the resources will be available to you as once you create a container. To learn more about containers..
Should you wish to leave a domain you have joined, you may select the domain from the side bar and click the red “Leave” button.
Creating a SciServer Compute Container
SciServer utilizes Docker—a container-based platform—allowing researchers to work and code in isolated environments curated to your intended tasks. Within SciServer, each user may have two of these environments, referred to as “containers”.
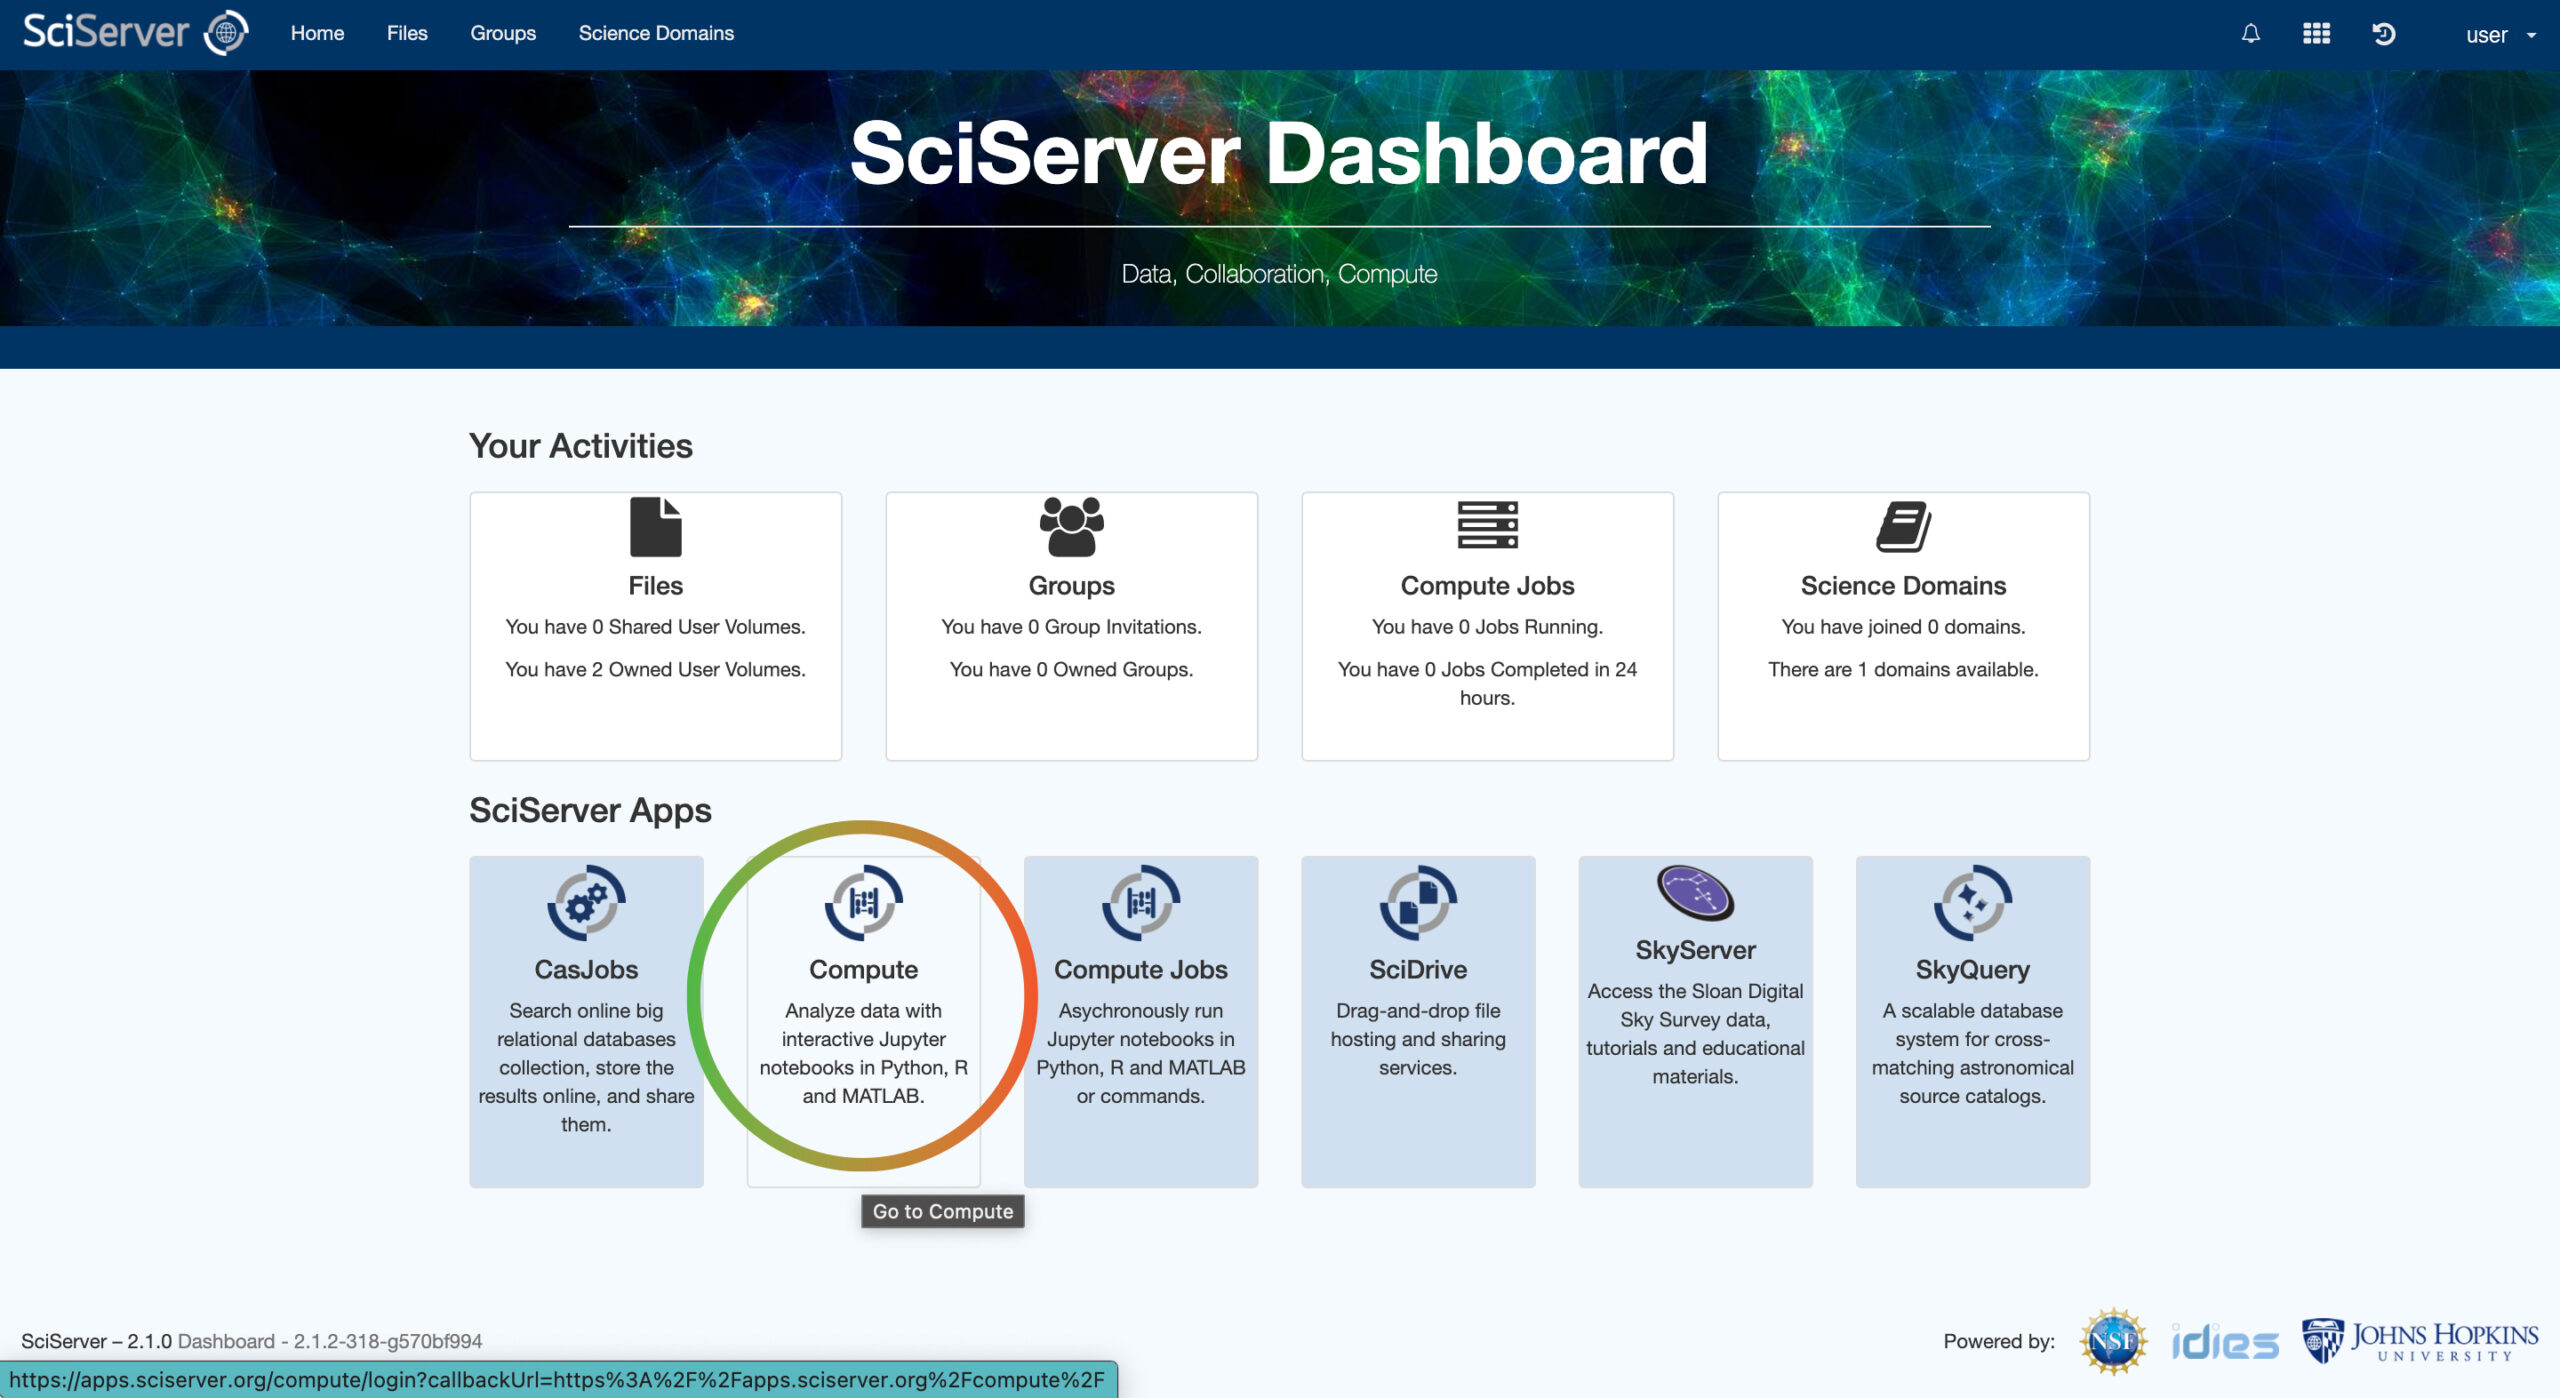
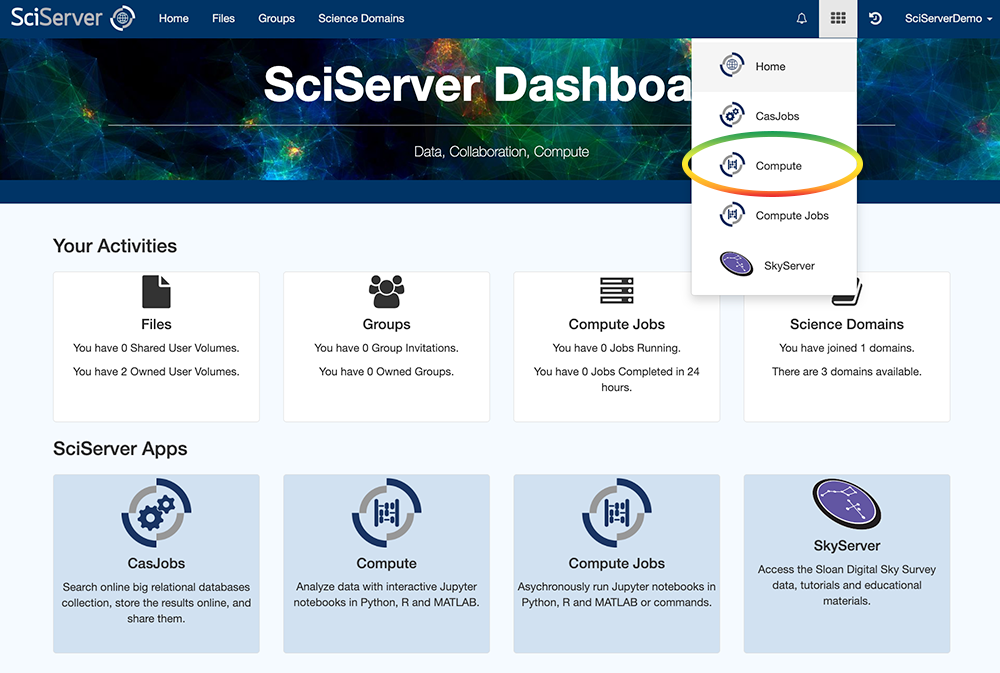
From the SciServer Dashboard, click the “Compute” button box from the list of apps or select the grid icon from the right side of the top menu bar and then click the “Compute” icon.
From the Compute Dashboard click “Create Container” and this will open a dialog box.
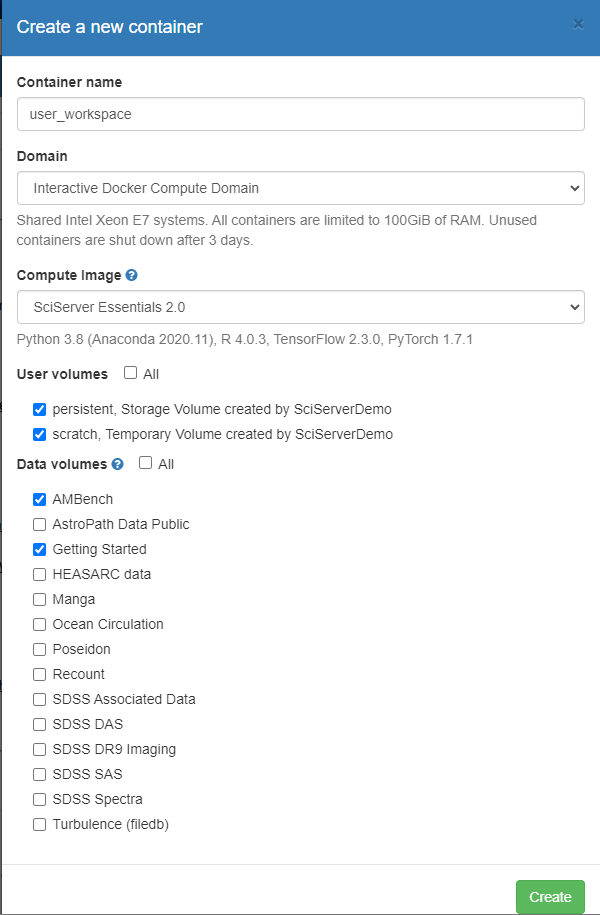
Enter the required information listed below in the dialog box (see the screenshot).
Container name: This field is up to you.
Domain: Leave at the default “Interactive Docker Compute Domain.”
Compute Image: Select “SciServer Essentials 2.0” from the dropdown list.
User Volumes: Locate and select the instances of “persistent” and “scratch” with your username next to it.
Data Volumes: select “AMBench” in order to mount the AMBench data, code, and scripts in the container. Optionally, select “Getting Started” to get other SciServer example notebooks you can copy.
Click “Create” and it will create the container, which will be listed in the Compute Dashboard.
Run the example notebooks in the container you created
From the Compute Dashboard, click on the name of the container you’ve just created to launch Jupyter.

Note: Be patient—the file may take a moment to load
In the Jupyter file browser you should see all the volumes mounted to your container when you created it. AM Bench data volume will appear as a folder named “ambench.”