
CIE24: Getting Started with SciServer
Welcome to the CIE 24 SciServer workshop!
What You Need
Before the start of the workshop, please follow the instructions on the rest of this page, so you can start right away.
To run the tutorial in the workshop, you will need five things:
- Your account on SciServer (section 1)
- Join the Manufacturing science domain to access the public NIST AMBench dataset (section 2)
- Accept a SciServer group invitation to get access to the private tutorial notebooks to be used in the workshop (section 3)
- Copy the tutorial notebooks to your persistent folder so you can edit them (section 4)
- Create a SciServer Compute container (section 5)
You can do the first two steps right now, and request access to the notebooks for the third step by sending your username to Shengyen Li (shengyen.li@nist.gov) with the subject line CIE24 SciServer Username.
About the Workshop
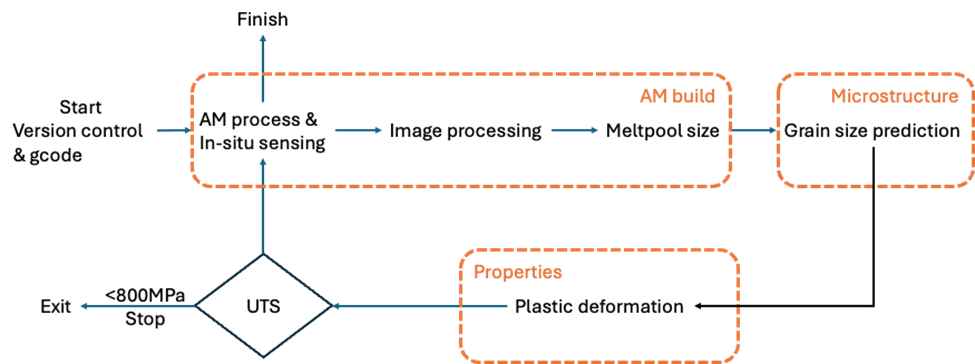
In this tutorial, you will learn how to use Digital Twinning to create a real-time control scenario for studying laser powder bed fusion additive manufacturing technology (LPBF-AM).
Digital Twins are datasets that represent the physical objects and processes used in manufacturing. Adding Digital Twinning as a step in the LPBF-AM process can help identify likely defects quickly enough to stop the process and fix problems.
This tutorial starts with a practical application of Digital Twinning, using a Python library to connect to data collected by the National Institute of Standards and Technology (NIST)’s AM Bench project.
The framework and modeling pipeline implementation is shared through the SciServer science platform. Before the workshop, attendees are encouraged to register an account and join the CIE24-DataMandDigitalTwin group – follow the instructions below to join.
If you have additional questions, see our How to Use SciServer pages or contact Shengyen Li (shengyen.li@nist.gov).
Why SciServer?
Some of the AM Bench datasets are very large (1 Terabyte or more) with thousands of files, and nearly all require additional processing to extract meaningful results that can be compared with model output. To help you make the best use these benchmark datasets quickly and easily, the AM Bench project has partnered with the Institute for Data-Intensive Science at Johns Hopkins University to provide server-side processing through SciServer Compute.
AM Bench users can create a SciServer.org login to use virtual machines that include Jupyter notebooks and pre-installed software packages for AM Bench data analysis.
1. Create and verify a SciServer account
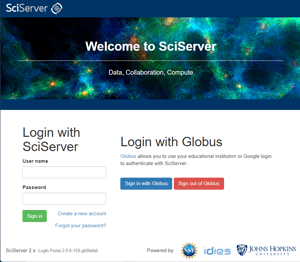
Go to the home page of www.sciserver.org and click the Login to SciServer button. The button will take you to the login page of the SciServer Dashboard website (https://apps.sciserver.org) shown in the screenshot. Click the Create a new account link to load the Registration page. You will see textboxes for registration information, as shown in the screenshot below.
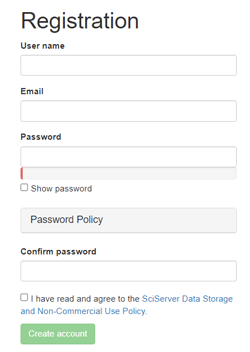
Enter a username of your choosing (note that it cannot be changed once created), an email address, and password (click “Password Policy” to expand a box showing password requirements).
Confirm your password, and click the box to agree to the SciServer Data Storage and Non-Commercial Use Policies. Then click Create account.
NOTE: You must confirm your email address! Check the address you provided at registration for a verification email from nobody@pha.jhu.edu with subject line “Welcome to SciServer!” and follow the link contained therein to complete your registration. This will automatically log you into SciServer with your username.
*You MUST verify your email before you attempt to login. If you attempt to log-in before verifying you will get locked out of your account.
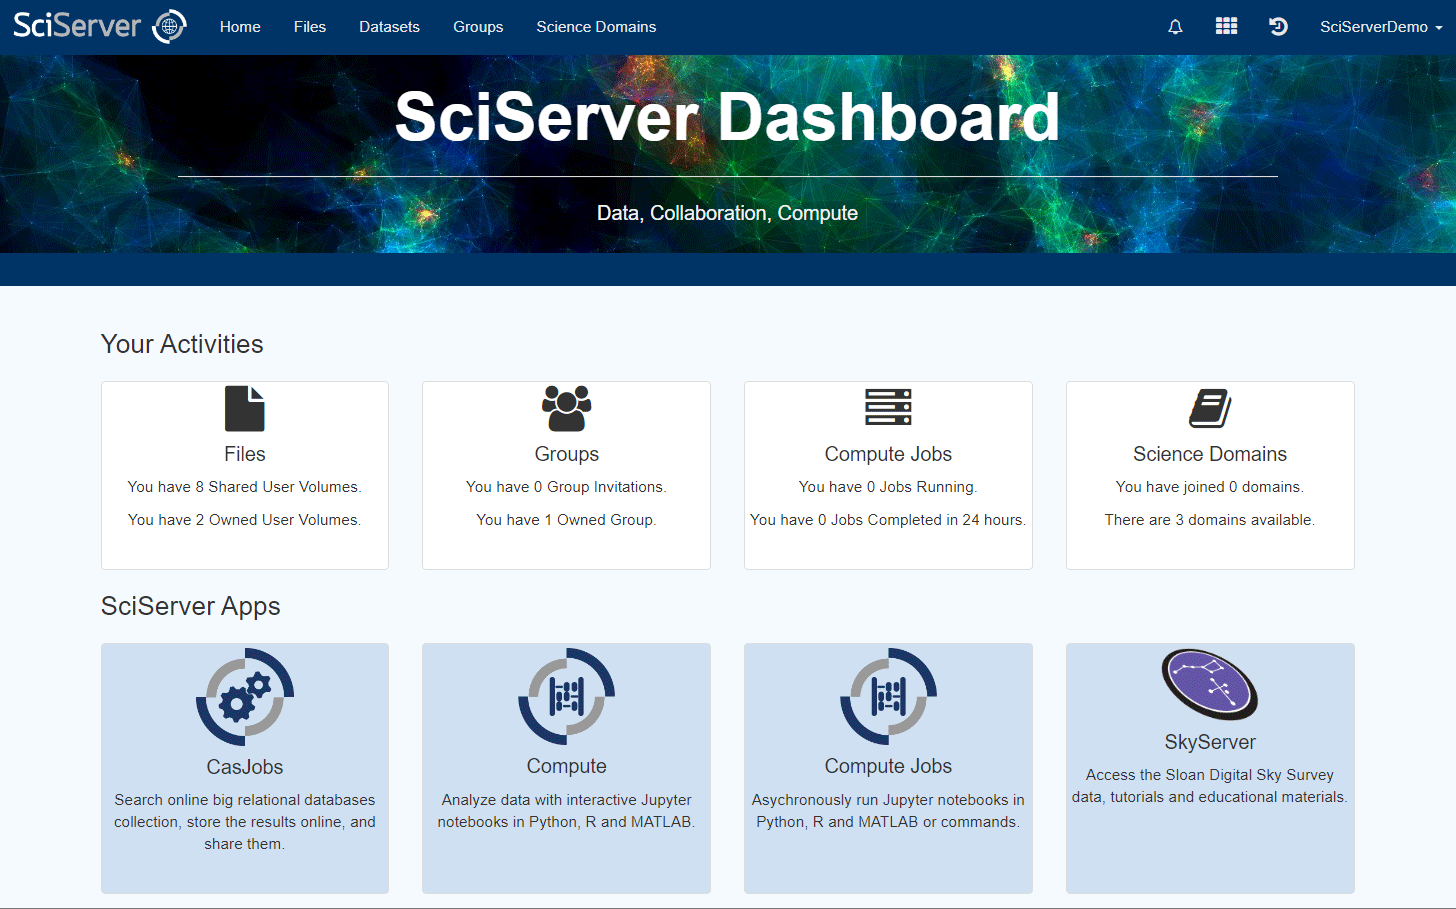
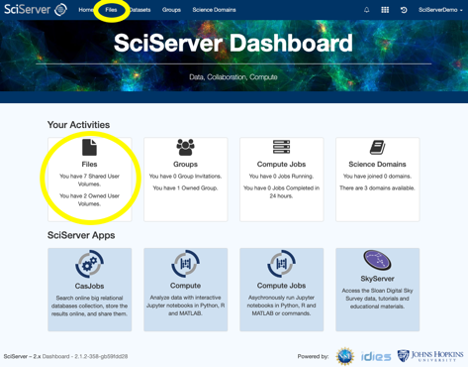
Once logged-in, you should see the SciServer Dashboard, as shown in the screenshot below. This will be your homepage each time you log into SciServer. Your login token lasts 24 hours, so you will need to log in again tomorrow.
By default, every SciServer user has access to user volumes called persistent and scratch. Persistent is 10 GB of storage owned exclusively by you. You have full read, write, and access granting privileges for your persistent volume, and your persistent volume is backed up. Unlike your persistent user volume, your scratch user volume is NOT backed up.*
You can access your ‘persistent’ user volume, by selecting the ‘Files’ tab.
You should always store all your scripts, and all the final results that you want to save, in your persistent volume.
*For further details on SciServer user volumes, see File Management: User Volume
2. Join the Manufacturing science domain
To obtain access to the AM Bench data for the tutorial, you must first join the SciServer Manufacturing science domain.
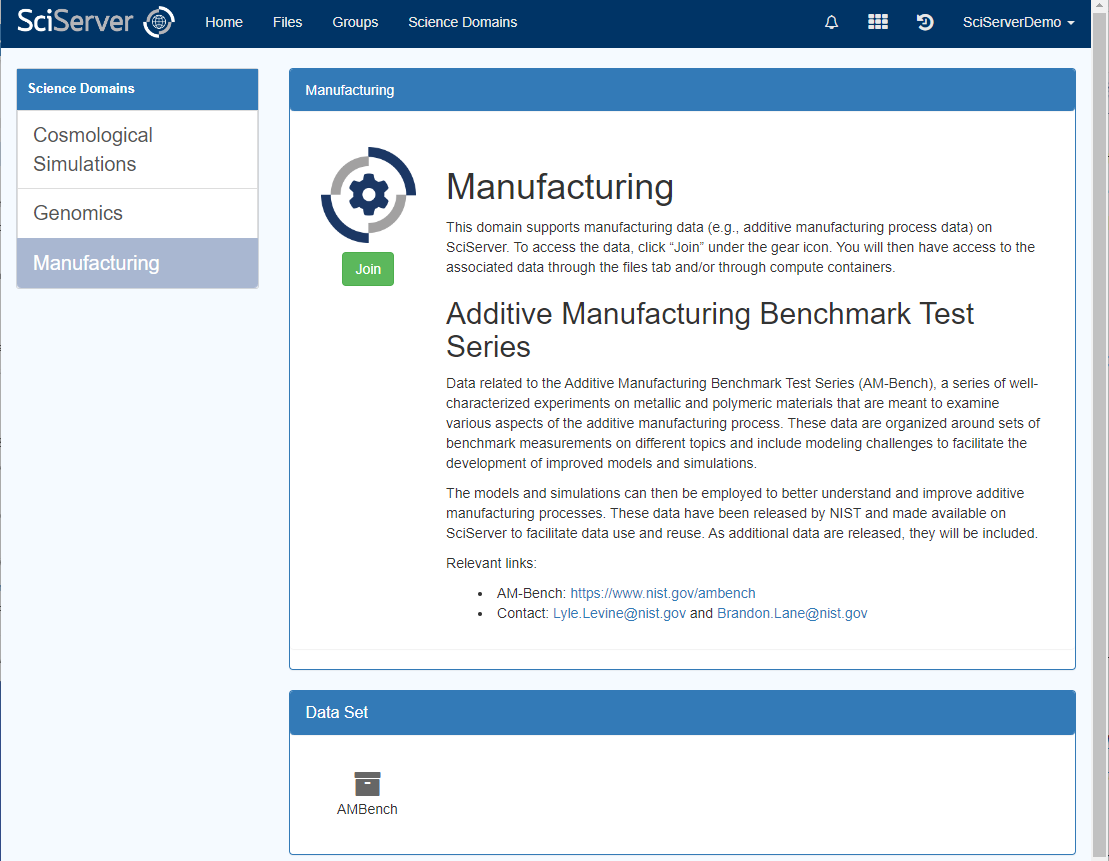
From the SciServer Dashboard, click “Science Domains” on the right of the first row of icons, or from the link in the top navigation bar. The Science Domains page is shown in the screenshot.
Select “Manufacturing” from the list in the left panel and click the green “Join” button in the main panel. Once you join the Manufacturing Science domain, a check mark will appear next to it in the list of Science Domains in the left column.
Optional: Browse the AM Bench datasets
You now have access to a public Data Volume called AMBench, which contains all the data, codes, and scripts from the NIST AM Bench project.
Click on Files in the top menu bar to see the list of User Volumes and Data Volumes that you have access to, and then click on Data Volumes to see the data volumes (read only).
Next, click on AMBench to enter the AMBench data volume. The AMB2022 folder contains the data. Click on the AMB2022 link to browse through the data.
When you are ready to visualize and analyze the data, move on to the rest of this guide to learn how to work with the Demo Notebooks.
3A. Request to join the workshop group
Once you have created a SciServer account and joined the Manufacturing science domain, you have access to the public data you will need for the workshop but you still need the private tutorial notebooks. To view those notebooks, you will need to be a member of the CIE24-DataMandDigitalTwin group.
To request to join the group, please e-mail your SciServer username to shengyen.li@nist.gov with the subject line CIE24 SciServer Username. Dr. Li will invite you to the group and reply to your email.
NOTE: you will not receive an email notification from SciServer. To see the group invite, you will need to return to your SciServer Dashboard.
Wait for Dr. Li’s reply, then return to this point in the instructions to accept the group invitation.
3B. Accept your invitation to the workshop group
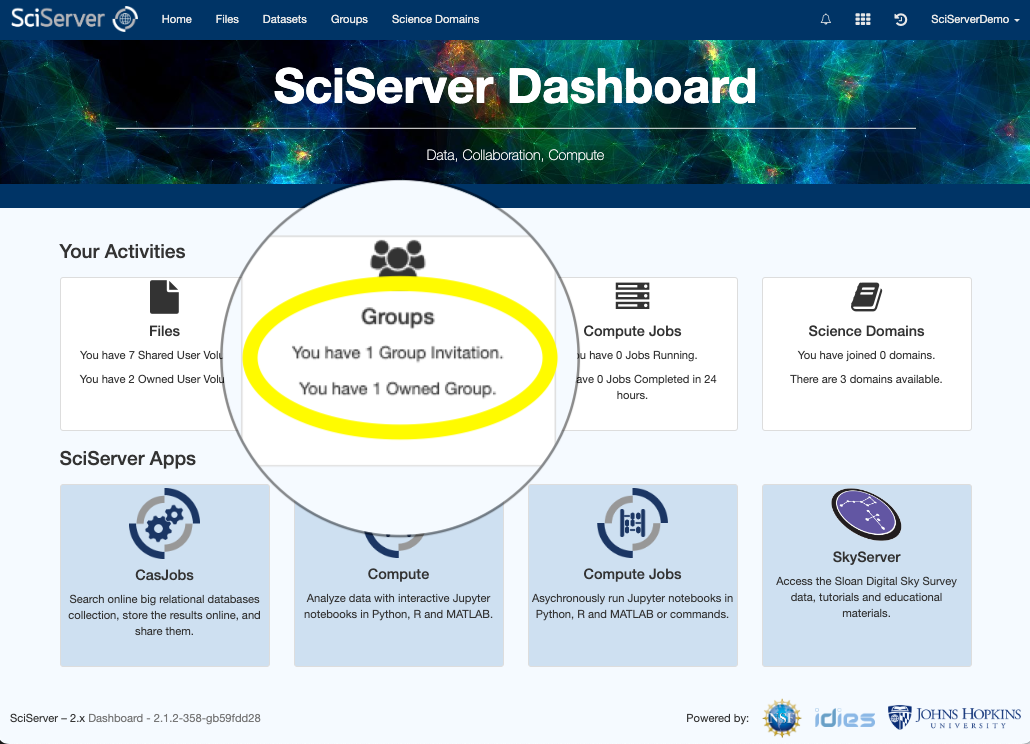
Log in once again to SciServer. You will again see the SciServer Dashboard. Click on Groups, marked with a yellow circle in the screenshot below:
When you click the Groups button, you will see the Groups page below:
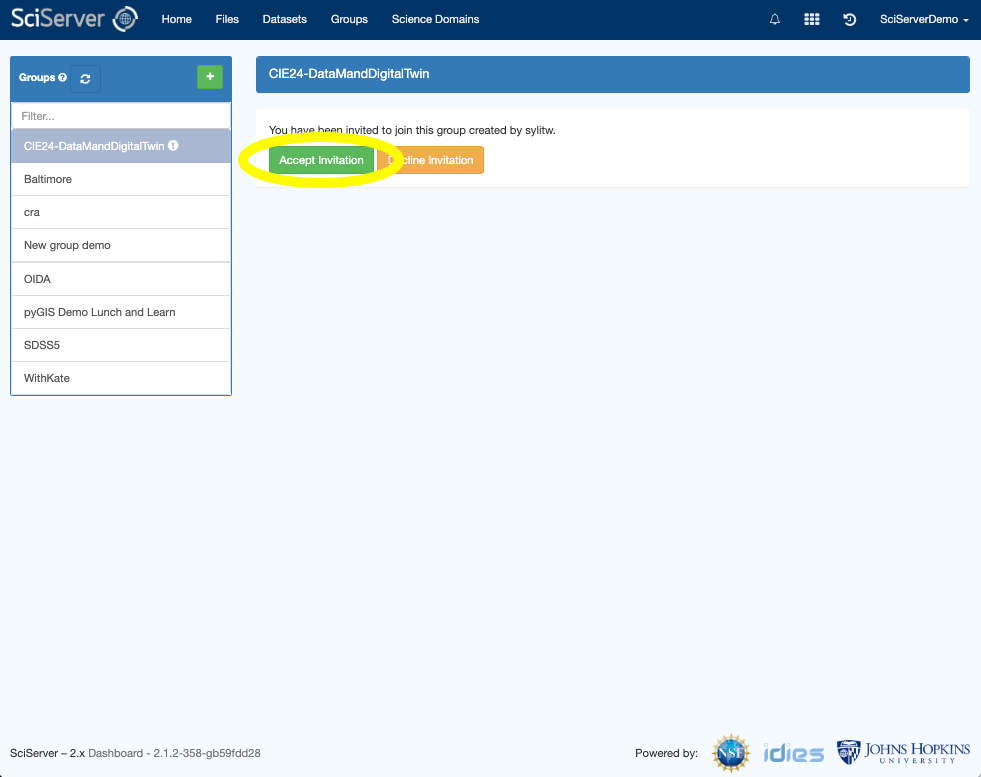
In the left-hand column, you will see a list of groups you have joined or been invited to. Click on CIE24-DataMandDigitalTwin, then click on the green Accept Invitation button to join the group.
4. Copy the tutorial notebooks to your persistent user volume
Once you have joined the Manufacturing science domain AND accepted the invitation to the CIE24-DataMandDigitalTwin group, go to the Files page (marked by the yellow circle in the screenshot below), which lists all the data and user volumes that you have access to.
NOTE: The shared User Volume in which the tutorial notebooks are stored is read-only, so you cannot save your changes! That is why it is so important to first move the tutorial notebooks to your persistent directory.
You will see the Files page, which looks like this:
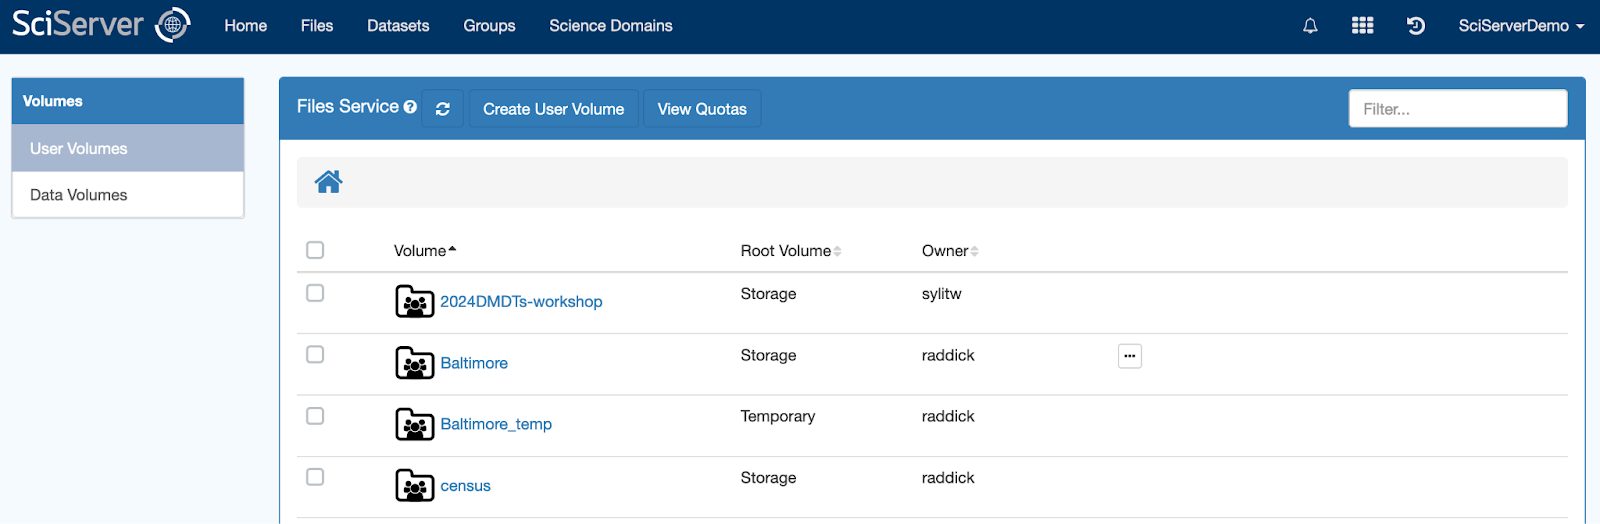
- Click on User Volumes in the left-hand panel to load the main panel with a list of user volumes you have access to.
- Click 2024DMDTs-workshop to view the user volume that has been shared with you as part of the workshop group. You will see four folders, the last of which is called DTNotebooks.
- Mouse over DTNotebooks and a “Copy” button will appear on the right side of the screen.
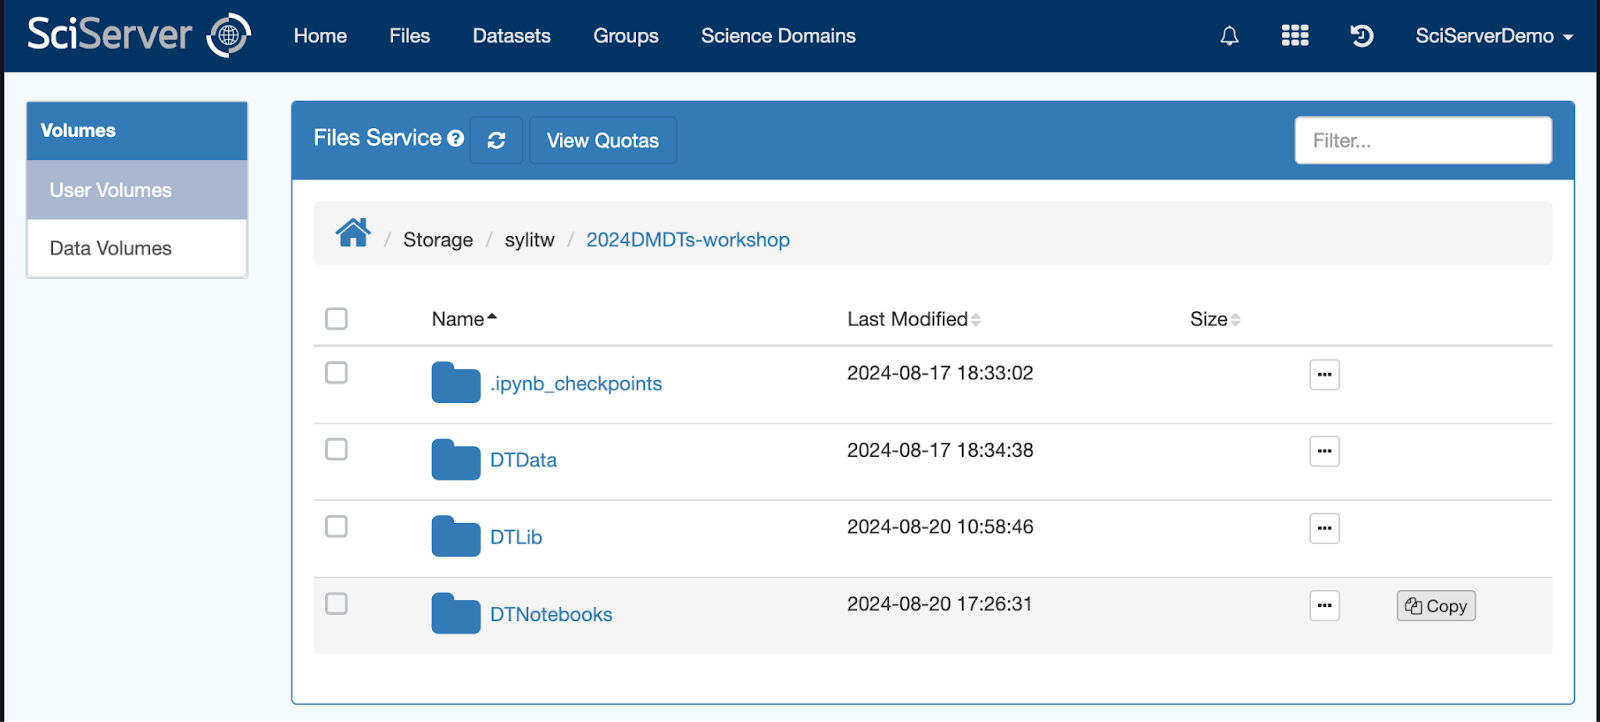
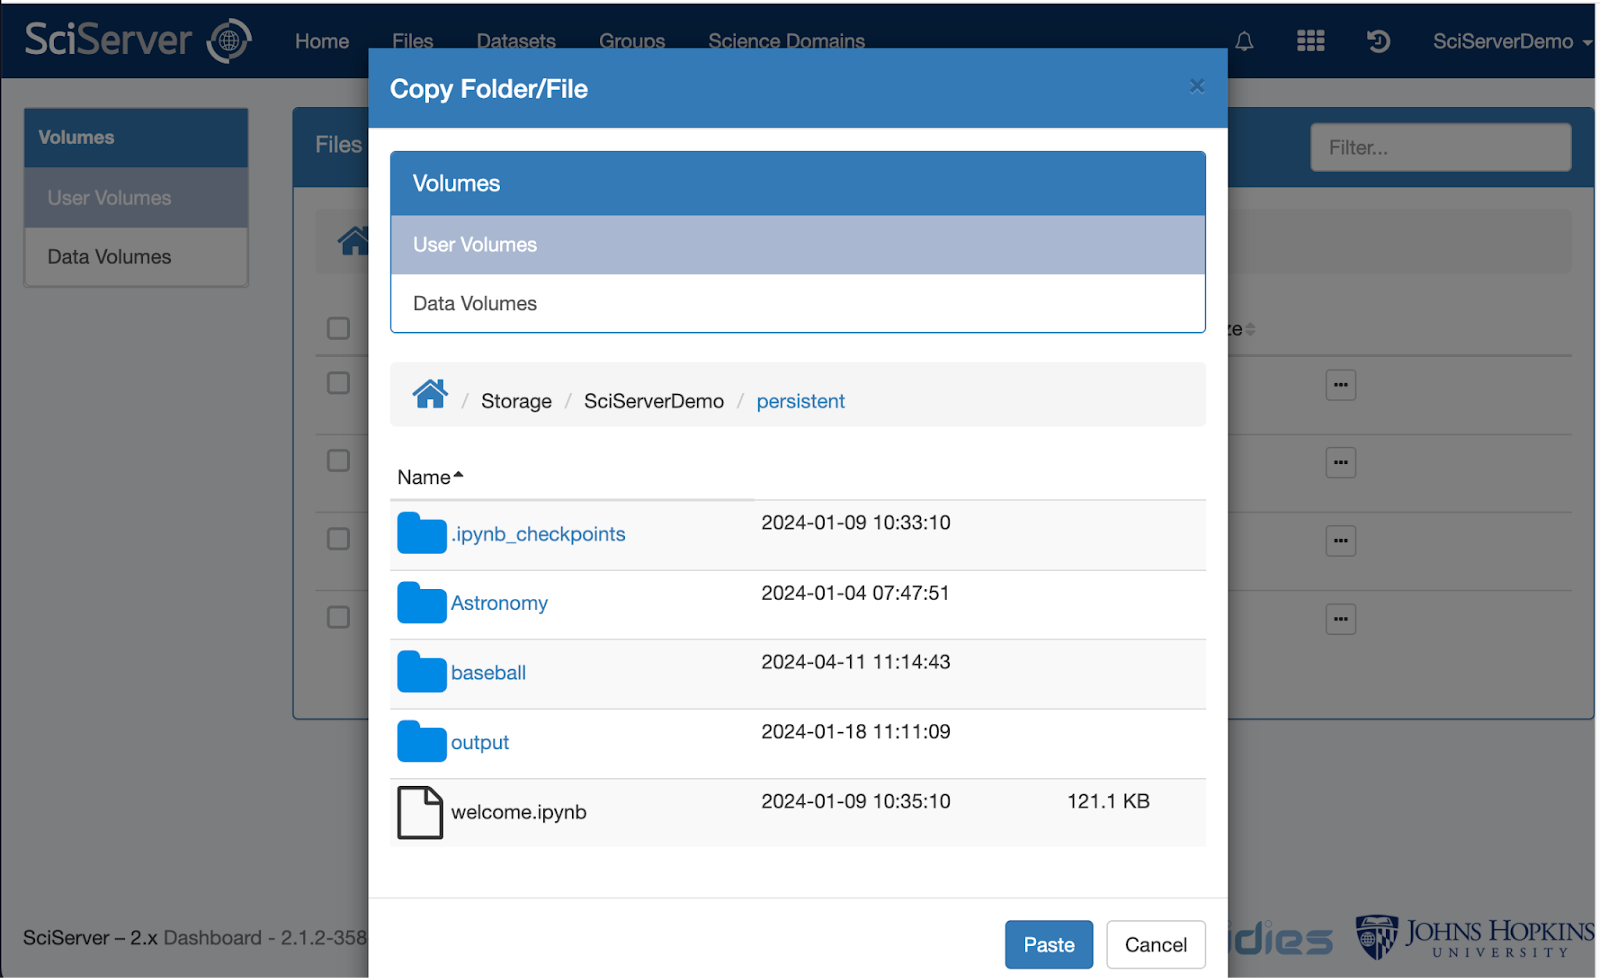
- Click Copy and a window will come up asking for a destination to place the copied files (see the image below).
- Put them in Storage -> $yourUserName -> persistent.
- From User Volumes, click persistent with your username next to it.
5. Create a SciServer Compute Container
This will serve as a workspace for you to be able to edit and run the code and scripts you just copied.
Click the “Home” button in the top navigation bar to return to the SciServer Dashboard, then select “Compute App” to run a container.
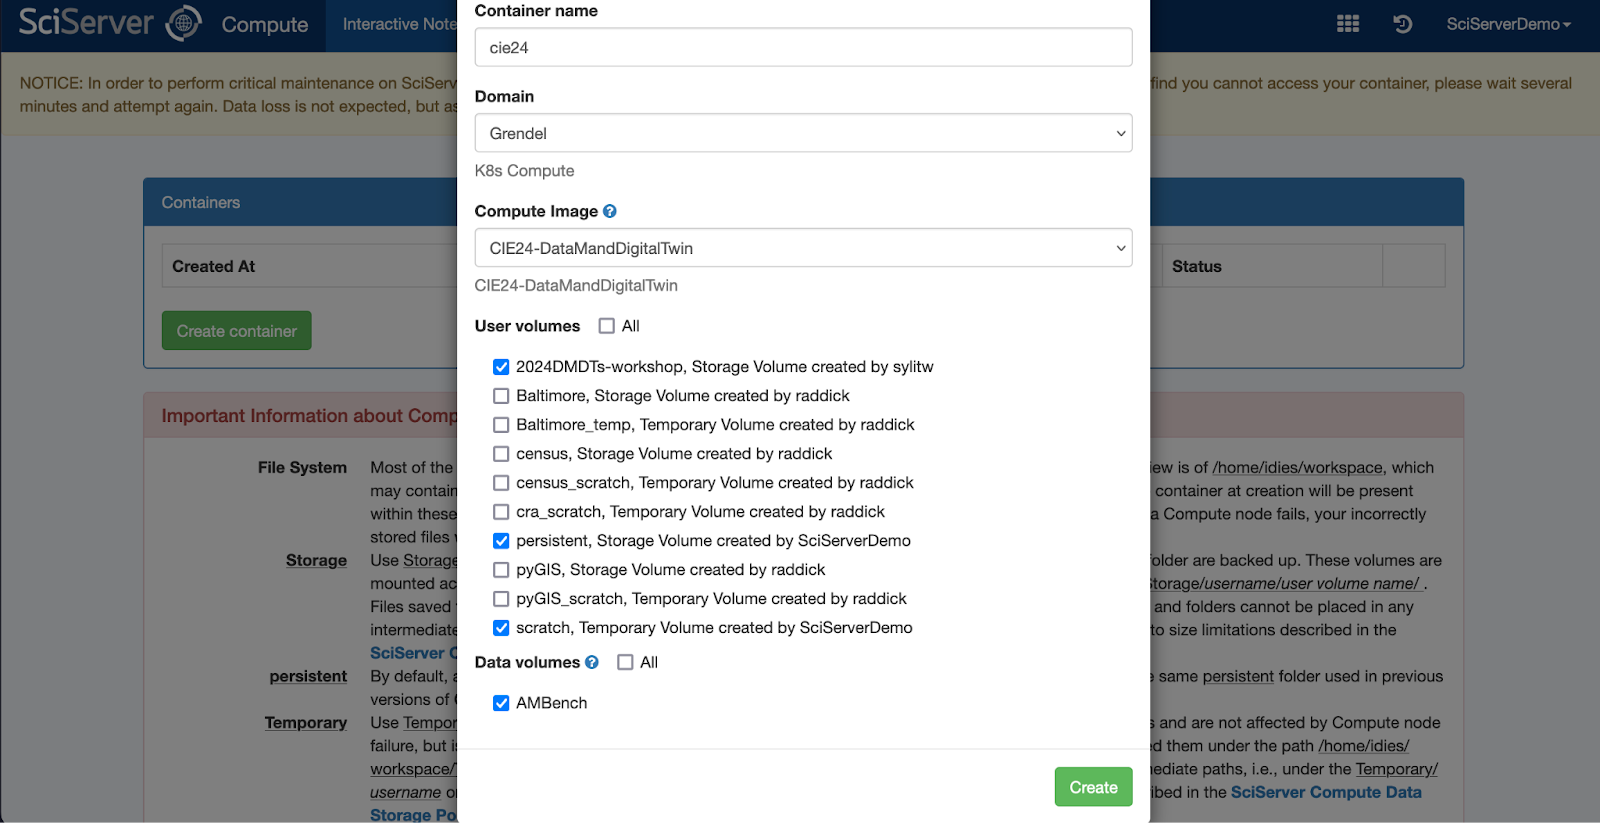
Create a container using the green button, using the following options:
- Give your container a name
- For Domain, select Grendel
- For Compute Image, select CIE24-DataMandDigitalTwin
- Under User Volumes, make sure both of the following are checked:
- your persistent volume (the one with your username next to it)
- the 2024DMDTs-workshop Storage Volume (created by sylitw)
- Under Data Volumes, make sure AMBench is checked
After creating your container, click on the name of your container to start it.
By default, the container runs on JupyterLab, but we need Jupyter Notebook for this tutorial. Select Help and Launch Classic Notebook.
A new tab will pop up, then navigate to Storage/$yourUserName/DTNotebooks folder, and select example notebook starting with 01_
Note: Changes you make to your persistent folder are only saved when you are logged in. Your login token lasts 24 hours, so you will need to log in each day to make sure all changes you make are preserved.